Fun Kids Crafts
Paper Roll Windmills
You can follow the step by step guide below. But you can also adapt the design to make them your own. Let your child’s imagination run free when it comes to the colours and patterns for their own windmill.
Maybe they can paint a little mouse running up theirs?
Summary
Time: 15 minutes
Ages: Little kids to Big kids
Difficulty: Easy peasy
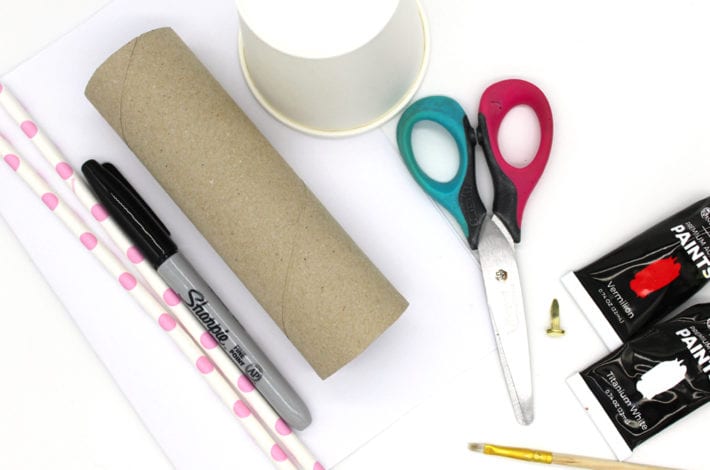
You will need:
- Cardboard rolls
- Paper sauce pots or cardboard cups
- Scissors
- Paints (ideally acrylic paints)
- Black Sharpie pen
- Paintbrush
- Drinking straws
- Paper fasteners
- Pencil
- Blue tac
- Ruler
- Glue
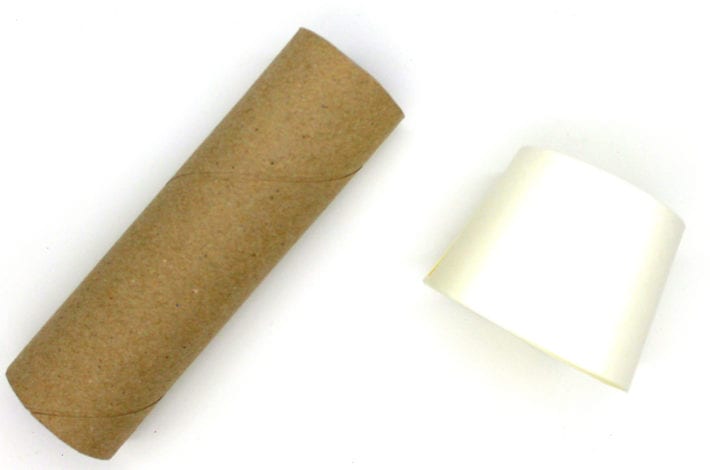
Step 1: Cut your paper roll and cup to size
Cut a long paper roll to size. It could be a roll from the inside of a cling film or wrapping paper or kitchen paper.
We made ours about 15 cm / 6 inches long.
Toilet roll tubes can work too – although they can look a little short.
Then cut 2cm / 1 inch off of the bottom of a paper cup.

Step 2: Paint your cardboard rolls and cups
Paint your paper tubes and paper cups. You can choose any colours you like.
We prefer to use acrylic paints as they give a thick layer of colour over the cardboard.
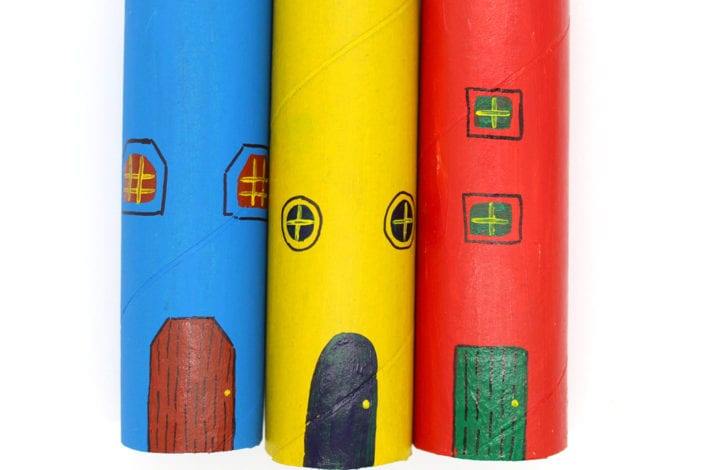
Step 3: Paint a door and some windows
Paint a door on your paper tube and some windows.
We used a black Sharpie pen to add the finer details.
Step 4: Make the spinning sails
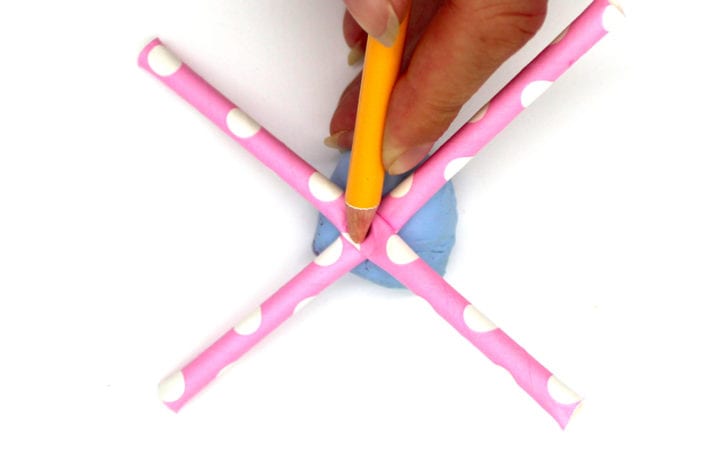
Trim 2 drinking straws so they are about 15 cm / 6 inches long. Lay one across the other in a cross shape.
Place them on a ball of blue tac and use a sharp pencil to pierce a hole through the centre of the straws.
Use the same technique make a hole in the paper cup too.
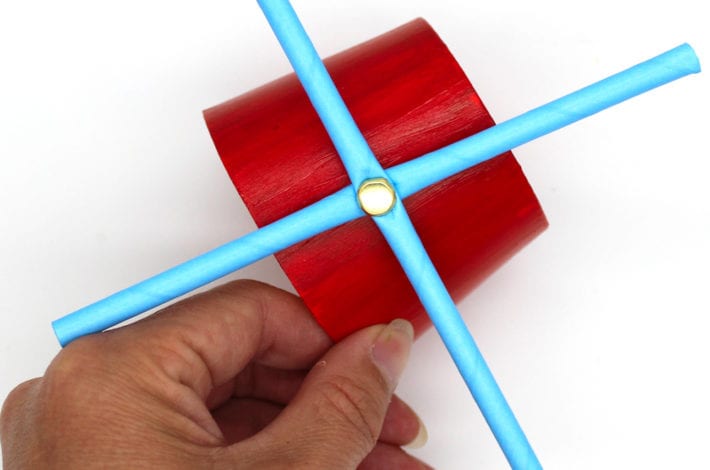
Step 5: Fix the sails in place
Thread a paper fastener through the holes in both straws and then through the hole in your paper cup.
Fold back the ends of the paper fastener to secure the straws in place.
Your straws will now spin round when you push them with your finger.
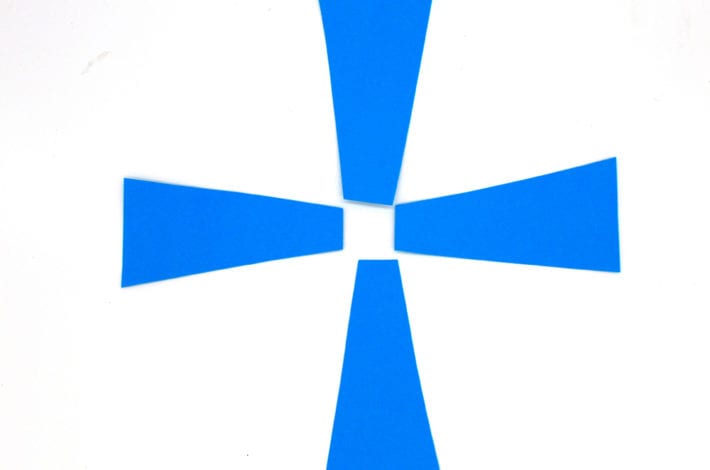
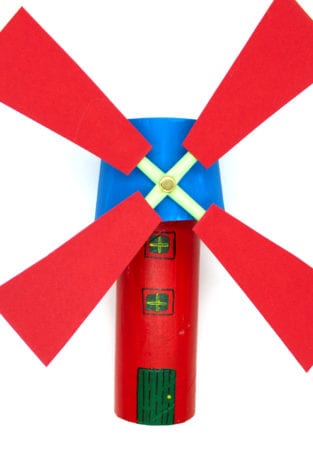
Step 6: Add the sails
Cut out four shapes from coloured card to make your windmill blades. You can use the photo as a guide if you like.
The blades are tapered rectangles. It helps if they’re all the same size.
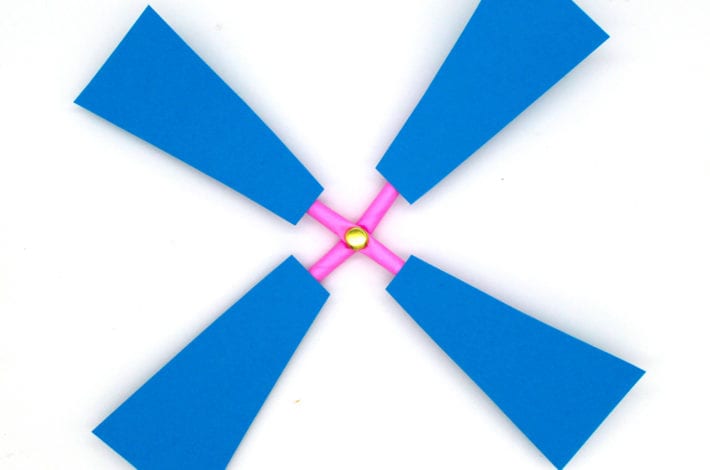
Step 7: Glue down the sail blades
Stick down each sail blade to the straws with glue.
Your windmill sails are now complete.
All you need to do now is to glue the top of your windmill to the paper roll.
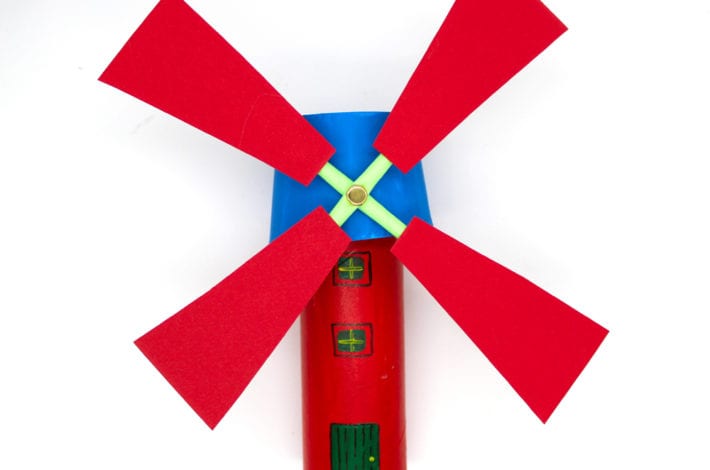
The paper roll windmill is ready to work
You can spin the sails around with your finger to watch them go.
If your child enjoyed this craft you could even make a collection of windmills in different colours and designs.
Pin it for later
Paper Roll Windmill Craft