Home · Kidspiration · Arts + Crafts · Magical paper cup fairy house

Magical paper cup fairy house

Magical paper cup fairy house image

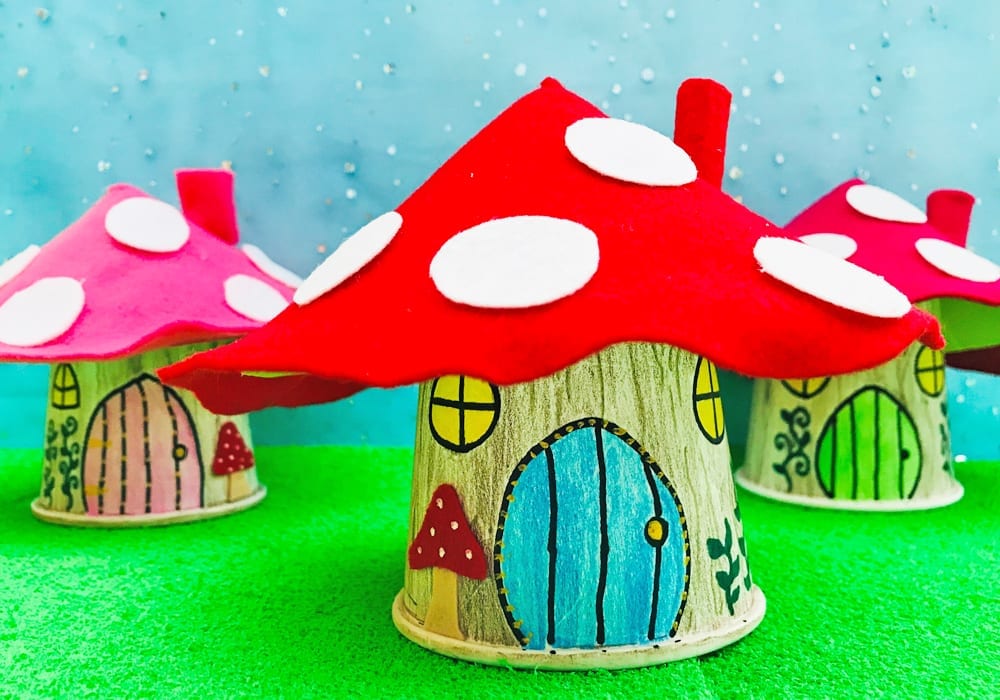
If you go down to the woods today, you might just find a magical surprise. Can you spy any woodland fairy houses nested among the trees or bushes?
 
This simple and quick craft allows your child to let their creativity flow. They can create their own details and make their little paper cup fairy house as detailed as they choose.
 
They might like to use glitters or collage materials to make their fairy house even more elaborate. They could also cut around the door so that it opens and pop a tealight inside to make it glow.


Summary

Time: 15 minutes
Age: Little kids to Big kids 
Difficulty: Easy peasy
01
You will need:

Fairy house craft - make your own fairy houses with this fun kids craft

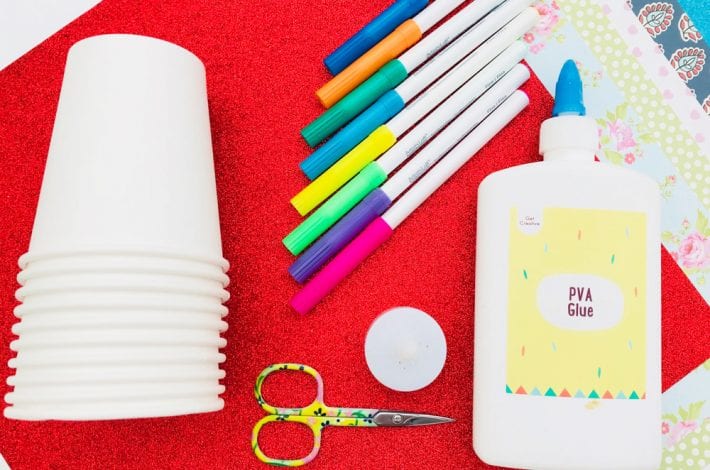
You will need:

  • Paper cups
  • Colouring pencils
  • Sharpie pens or felt pens
  • Card
  • Scissors
  • Glue
  • Red and white felt

02
Step 1: Draw on the door and windows

Magical paper cup fairy house - a fun and simple DIY fairy house craft - why not craft a fairy village

Step 1: Draw on the door and windows

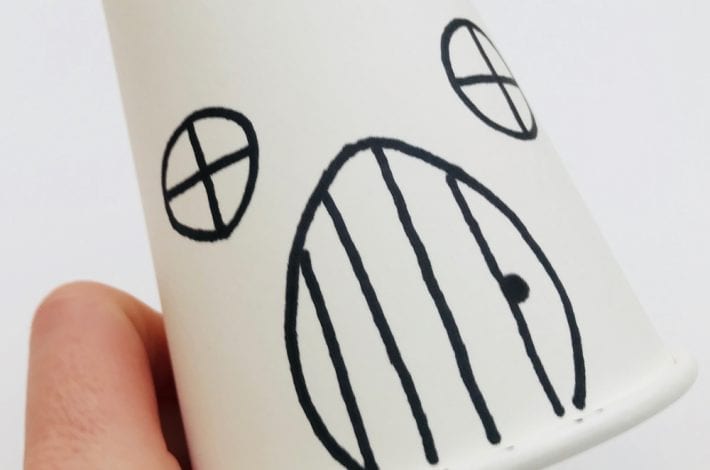
Take a paper cup.

Use a black pen to draw the outlines of the door and windows.
03
Step 2: Add more detail and colour

Magical paper cup fairy house - a fun and simple DIY fairy house craft - why not craft a fairy village

Step 2: Add more detail and colour

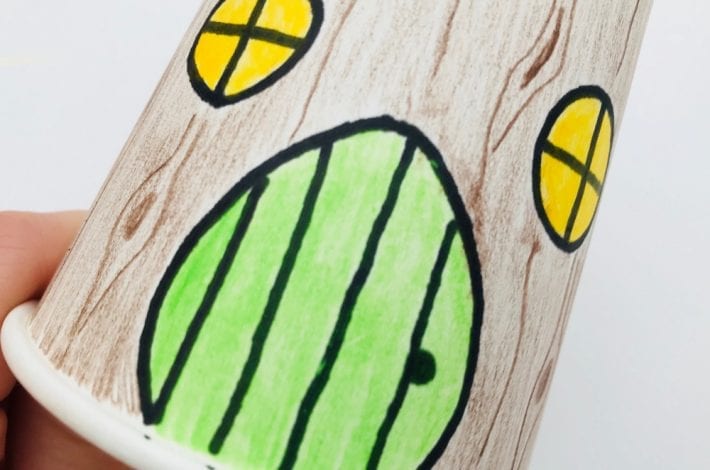
Take some time to add more colour your fairy house. We used brown coloured pencils to colour the whole cup and then to draw lines for the knots and lines of the wood.

You can make your fairy houses as decorative as you like.
04
Step 3: Cut out circles of card to make the roof

Magical paper cup fairy house - a fun and simple DIY fairy house craft - why not craft a fairy village

Step 3: Cut out circles of card to make the roof

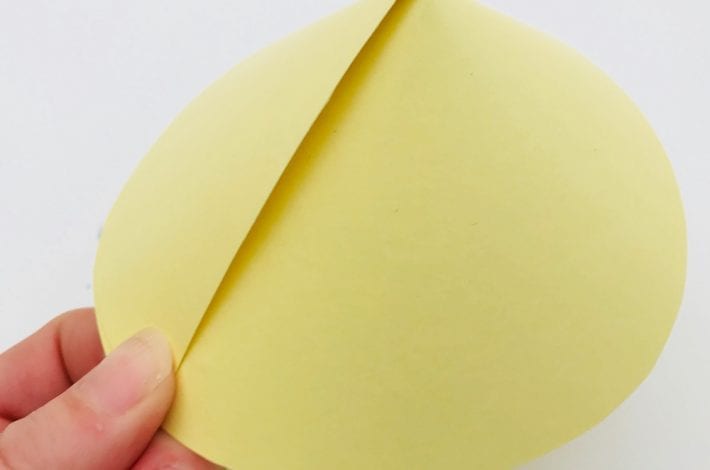
Place a small side plate on your coloured or patterned card and draw round it to make a circle.

Cut out the circle and also cut a line to the centre.

Roll the two sides of your card circle inwards to make a cone.

Once it’s the right size to fit on your paper cup glue, staple or tape the edges in place.
05
Step 4: Cut out felt to cover the roof

Magical paper cup fairy house - a fun and simple DIY fairy house craft - why not craft a fairy village

Step 4: Cut out felt to cover the roof

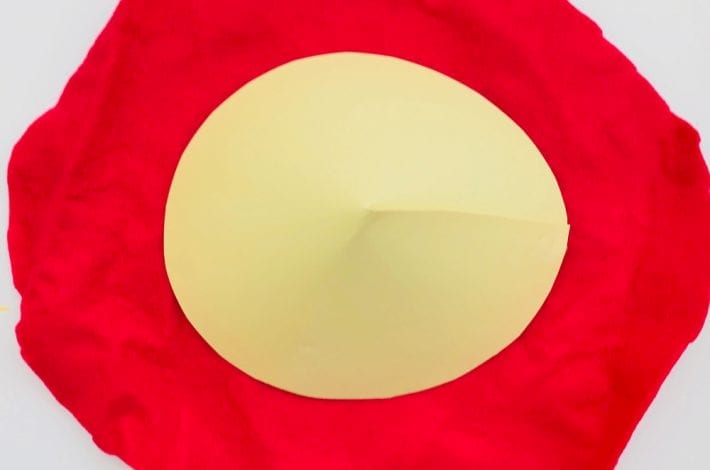
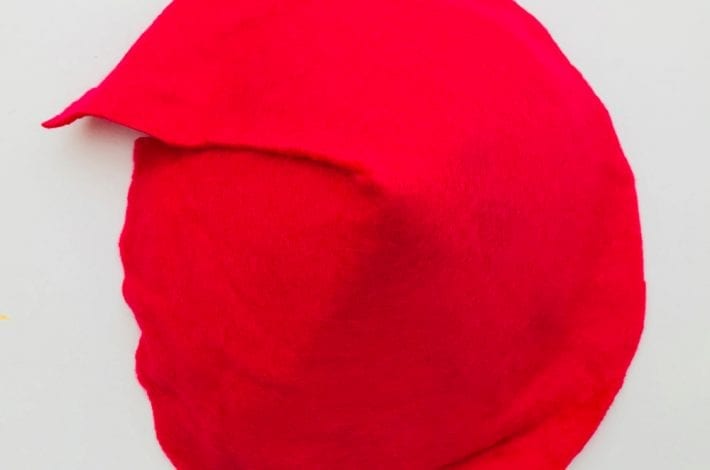
Lay your cone onto a piece of red felt and cut a circle a bit larger than the cone.
06
Step 5: Glue down the felt

Magical paper cup fairy house - a fun and simple DIY fairy house craft - why not craft a fairy village

Step 5: Glue down the felt

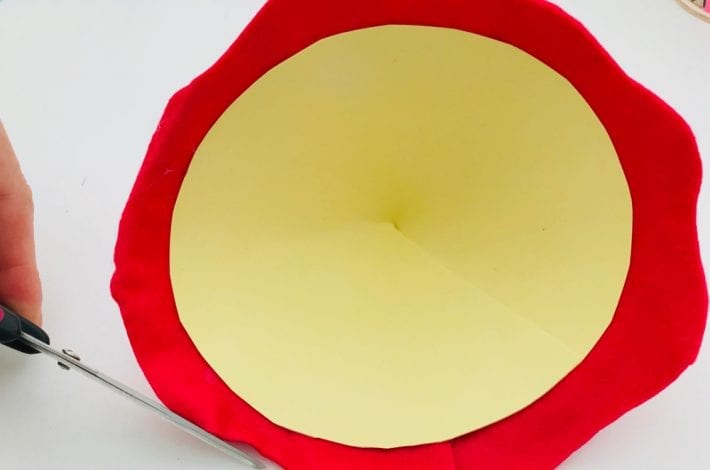
Cut a line from one edge of your felt circle to the centre. Then glue the felt onto the paper cup. Trim away any excess.
07
Step 6: Trim your roof edges

Magical paper cup fairy house - a fun and simple DIY fairy house craft - why not craft a fairy village

Step 6: Trim your roof edges

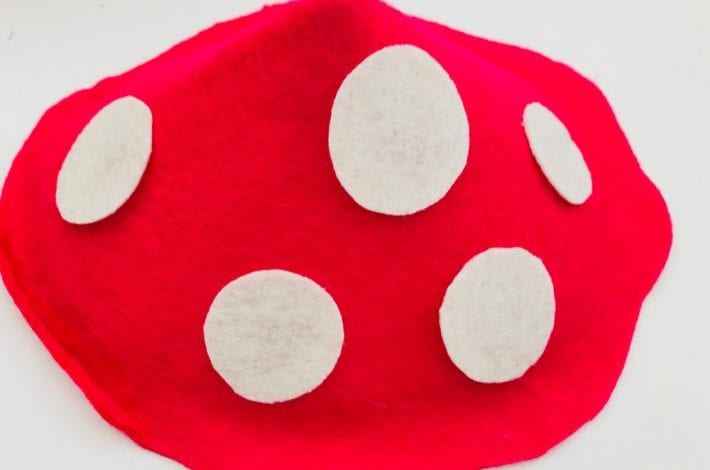
Cut around the edges of your roof. You don’t need to cut a neat edge. Wavy lines make your roof look more like a natural toadstool.
08
Step 7: Add some spots

Magical paper cup fairy house - a fun and simple DIY fairy house craft - why not craft a fairy village

Step 7: Add some spots

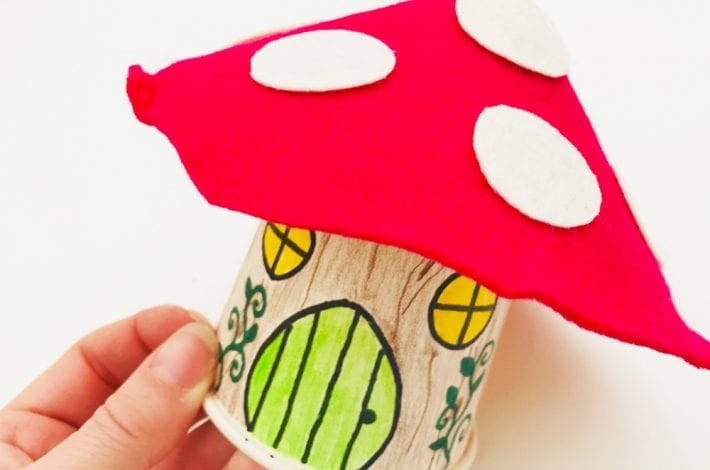
Cut some small circles of white felt and glue them on to your roof to make it look like a toadstool.
09
Step 8: Stick the roof in place

Magical paper cup fairy house - a fun and simple DIY fairy house craft - why not craft a fairy village

Step 8: Stick the roof in place

Now stick your roof onto your paper cup.
10
Step 9: Why not make a little chimney?

Magical paper cup fairy house - a fun and simple DIY fairy house craft - why not craft a fairy village

Step 9: Why not make a little chimney?

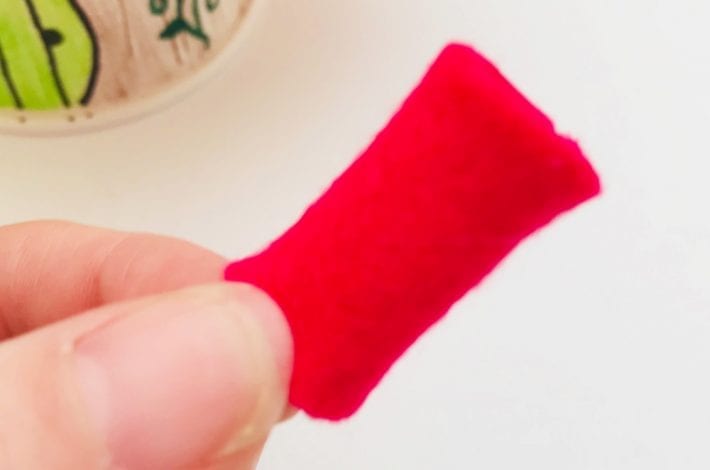
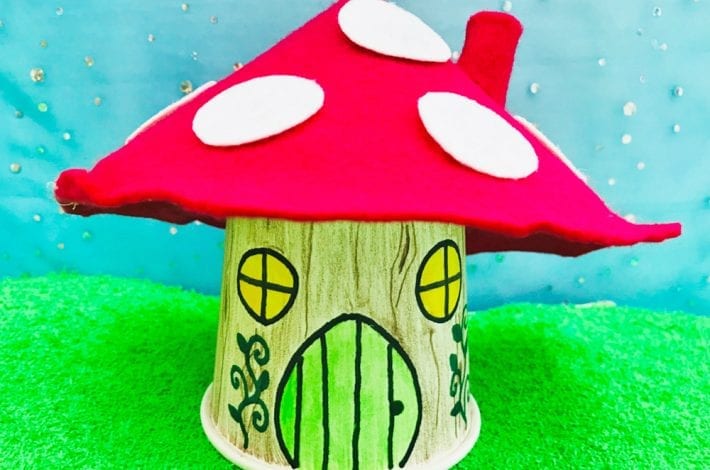
You can make a chimney by cutting a small rectangle of red felt and rolling it into a tube. You can then stick it on top of the roof.
11
Step 10: Add some finishing touches

Magical paper cup fairy house - a fun and simple DIY fairy house craft - why not craft a fairy village

Step 10: Add some finishing touches

Your magical woodland fairy house is almost ready. You can add some finishing touches by drawing on leaves or climbing plants with green pen or adding any other embellishments you like.

You can make them light up in the dark by placing a battery operated tealight underneath the cups!

You can make some more fairy houses to build up a fairy village
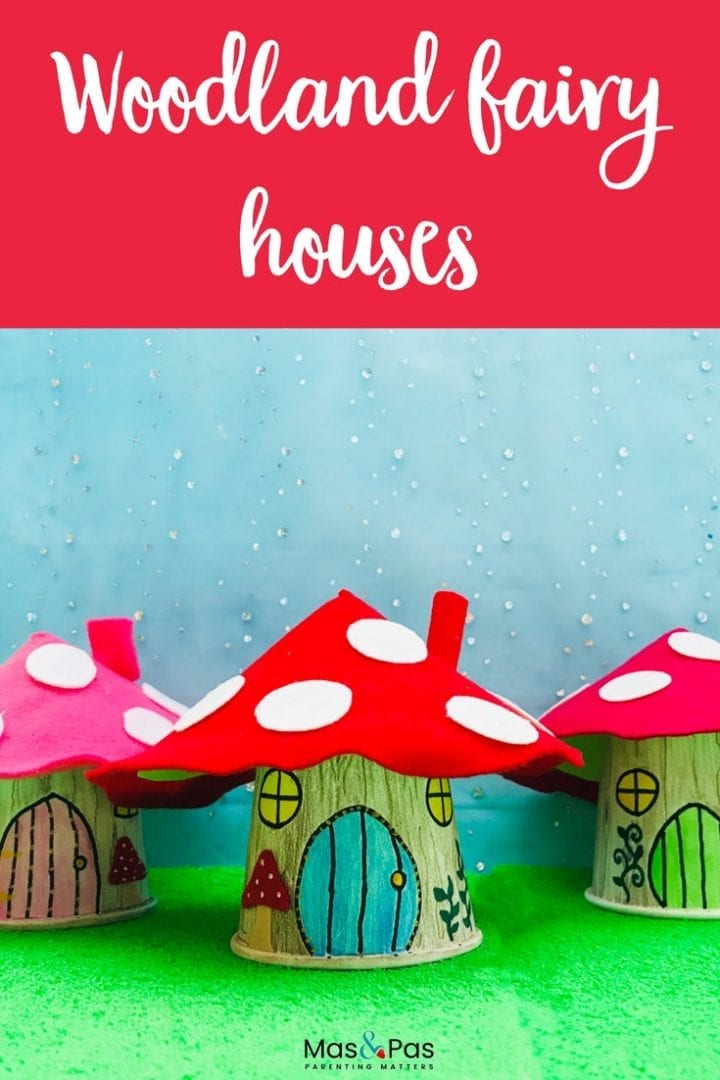
 

Magical paper cup fairy house - a fun and simple DIY fairy house craft - why not craft a fairy village


Magical paper cup fairy house

7
Magical paper cup fairy house - a fun and simple DIY fairy house craft - why not craft a fairy village

If you go down to the woods today, you might just find a magical surprise. Can you spy any woodland fairy houses nested among the trees or bushes?
 
This simple and quick craft allows your child to let their creativity flow. They can create their own details and make their little paper cup fairy house as detailed as they choose.
 
They might like to use glitters or collage materials to make their fairy house even more elaborate. They could also cut around the door so that it opens and pop a tealight inside to make it glow.


Summary

Time: 15 minutes
Age: Little kids to Big kids 
Difficulty: Easy peasy

01
You will need:

Fairy house craft - make your own fairy houses with this fun kids craft

You will need:

  • Paper cups
  • Colouring pencils
  • Sharpie pens or felt pens
  • Card
  • Scissors
  • Glue
  • Red and white felt

02
Step 1: Draw on the door and windows

Magical paper cup fairy house - a fun and simple DIY fairy house craft - why not craft a fairy village

Step 1: Draw on the door and windows

Take a paper cup.

Use a black pen to draw the outlines of the door and windows.

03
Step 2: Add more detail and colour

Magical paper cup fairy house - a fun and simple DIY fairy house craft - why not craft a fairy village

Step 2: Add more detail and colour

Take some time to add more colour your fairy house. We used brown coloured pencils to colour the whole cup and then to draw lines for the knots and lines of the wood.

You can make your fairy houses as decorative as you like.

04
Step 3: Cut out circles of card to make the roof

Magical paper cup fairy house - a fun and simple DIY fairy house craft - why not craft a fairy village

Step 3: Cut out circles of card to make the roof

Place a small side plate on your coloured or patterned card and draw round it to make a circle.

Cut out the circle and also cut a line to the centre.

Roll the two sides of your card circle inwards to make a cone.

Once it’s the right size to fit on your paper cup glue, staple or tape the edges in place.

05
Step 4: Cut out felt to cover the roof

Magical paper cup fairy house - a fun and simple DIY fairy house craft - why not craft a fairy village

Step 4: Cut out felt to cover the roof

Lay your cone onto a piece of red felt and cut a circle a bit larger than the cone.

06
Step 5: Glue down the felt

Magical paper cup fairy house - a fun and simple DIY fairy house craft - why not craft a fairy village

Step 5: Glue down the felt

Cut a line from one edge of your felt circle to the centre. Then glue the felt onto the paper cup. Trim away any excess.

07
Step 6: Trim your roof edges

Magical paper cup fairy house - a fun and simple DIY fairy house craft - why not craft a fairy village

Step 6: Trim your roof edges

Cut around the edges of your roof. You don’t need to cut a neat edge. Wavy lines make your roof look more like a natural toadstool.

08
Step 7: Add some spots

Magical paper cup fairy house - a fun and simple DIY fairy house craft - why not craft a fairy village

Step 7: Add some spots

Cut some small circles of white felt and glue them on to your roof to make it look like a toadstool.

09
Step 8: Stick the roof in place

Magical paper cup fairy house - a fun and simple DIY fairy house craft - why not craft a fairy village

Step 8: Stick the roof in place

Now stick your roof onto your paper cup.

10
Step 9: Why not make a little chimney?

Magical paper cup fairy house - a fun and simple DIY fairy house craft - why not craft a fairy village

Step 9: Why not make a little chimney?

You can make a chimney by cutting a small rectangle of red felt and rolling it into a tube. You can then stick it on top of the roof.

11
Step 10: Add some finishing touches

Magical paper cup fairy house - a fun and simple DIY fairy house craft - why not craft a fairy village

Step 10: Add some finishing touches

Your magical woodland fairy house is almost ready. You can add some finishing touches by drawing on leaves or climbing plants with green pen or adding any other embellishments you like.

You can make them light up in the dark by placing a battery operated tealight underneath the cups!

You can make some more fairy houses to build up a fairy village


Magical paper cup fairy house - a fun and simple DIY fairy house craft - why not craft a fairy village


Mas&Pas

Sign up for an account

Passwords need at least 8 characters, a lower and uppercase letter and a number.
Mas&Pas

Verify your account

Please enter a valid code

Please enter a valid email

We have resent your email

We have resent your verification code to the email address you provided. Please check your inbox and spam folder.

If your email hasn't arrived or you have trouble activating your account please feel free to contact us